


![]()
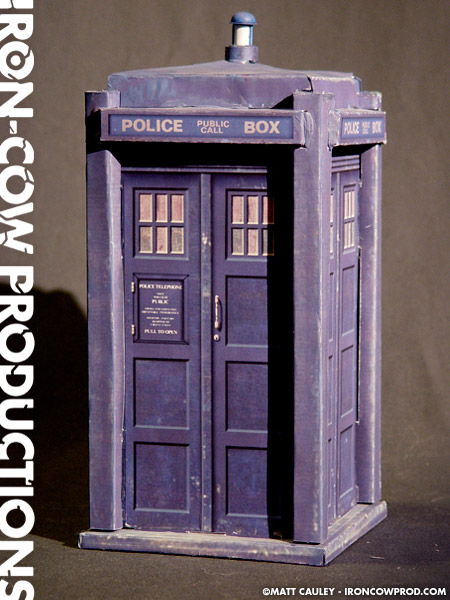
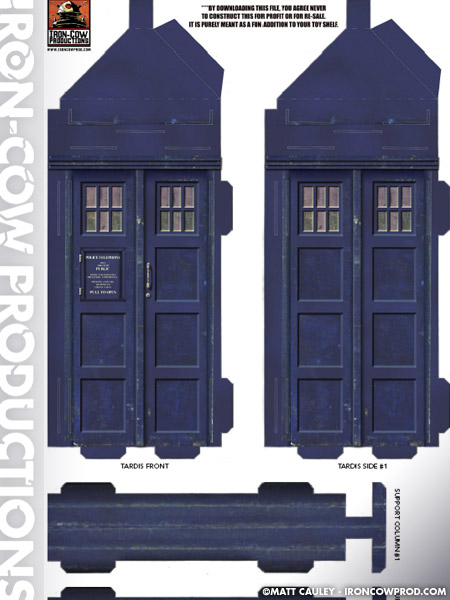
The TARDIS is adapted from the “Build your own TARDIS” project as featured in the Doctor Who Technical Manual. I did the entire coloring and texturing, but it’s based on their design.
Note: As with any ICP download, these files are not to be resold under any conditions.
MATERIALS NEEDED:
-Bristol board
-Foam Core
-Hot glue (optional)
-Tape
-X-acto knife with lots and lots of blades
-Kneadatite or modeling putty. See our FAQ section for details on Kneadatite.
NOTE: This project is a bit time-consuming. It’s really easy to assemble, but you’ll need to cut out a lot of pieces.
INSTRUCTIONS (updated July 2009!):
Here’s what I suggest you do:
1. Download all the PDF by clicking on the image below.
2. The downloadable TARDIS is formatted for 11 x 17″ paper, but you can print it at any size you like. Printing it on coated cardstock is preferred.
3. Make sure all those little rectangle slots are totally removed. Don’t just cut a slit. Remove the little opening altogether.
4. At this point it gets into a bit of trial and error. I’d test fit everything, and then tape/glue all the pieces together. Before you seal the top or bottom, add some pieces of foam core to the inside walls. This will really strengthen the whole TARDIS.
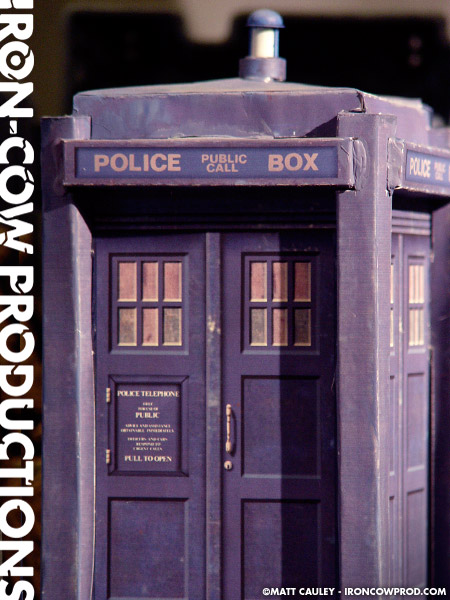
5. For the siren: You can use the rectangle siren that’s here, or create a more on-model one. I basically used stuff I found in my studio. I sliced up a Bic Pen for the top light assembly. This was surrounded by a slightly thicker piece of plastic for the base. Two pieces of styrene were glued to the sides of the light support. The rounded top was a wooden half-sphere glued to a washer.
***If you make your own siren, then have all the tabs overlap on top. The visual picture shows a hole on top. Don’t do that. Keep it flat, and you can just glue the siren on top.
6. Once the piece is all assembled, you’ll note some gaps here and there. Use any sort of putty (I suggest Kneadatite) to plug the holes. Paint the putty to match and you’re done!
7. PLEASE DO NOT REPOST THESE FILES ANYWHERE ELSE. Instead, simply direct people back here to https://www.ironcowprod.com/the-tardis/. And, if you do use these files, be sure to email me some photos! I’d love to see how it turned out.
CLICK HERE TO DOWNLOAD THE PDF TARDIS.
If you run into any problems, or my instructions got confusing, don’t hesitate to e-mail me.
Good luck, and enjoy!
Created Spring 2002
Featured in CustomCon 6
![]()
![]()
