![]()
One of the most basic techniques to customizing is the simple headswap. Although there are many different approaches to doing this, the end result is mostly the same.
Presented here are a few approaches I have used to replace the head on an action figure.

Interchangeable parts

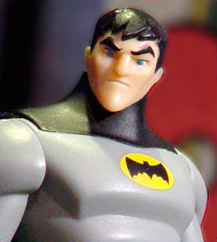
The Batman Unmasked custom above was involves the easiest headswap technique: similar components and soft plastic. The plastic was so flexible on both figures it only took popping off one head and placing it onto another.
This only worked because both figures had a similar torso with an identical neck post. Most custom figure headswaps generally take a little more effort…

Fixed-position heads
Want to replace the head of one figure with that of another?
The easiest way to is by taking an X-Acto knife and carefully removing both the original head and the replacement head from their bodies. Simply slide the tip of the blade into the neck-joint, and then cut away. The head should pop off easily. You can then use a drop of Super Glue to position the new head on its new body.
The main drawback to this is the lack of articulation. The head will remain in a fixed position. Still, this approach can be done in under a minute and is useful if you aren’t going to be displaying the figure in a variety of poses.

Articulated heads

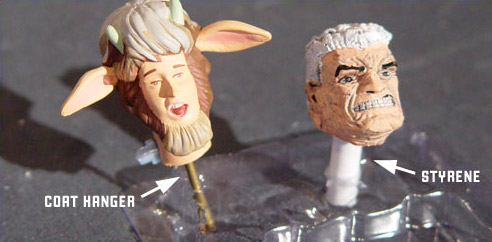
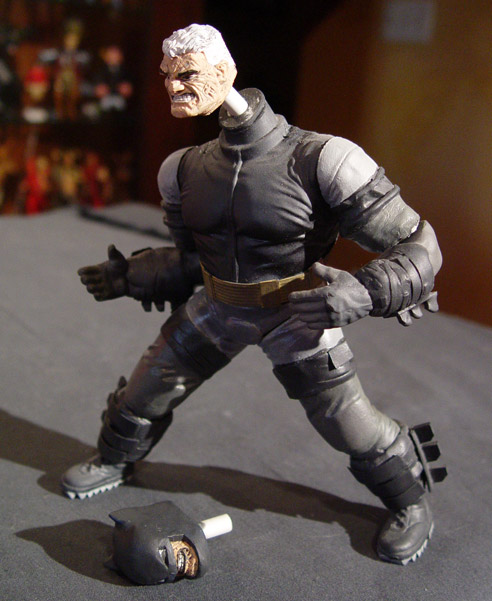
If you would like to maintain head articulation in your custom, you can remove the head as described above, and then either insert a thin metal rod or plastic styrene tube to create a new neck post. Either material works just as well; it all just comes down to your personal preference.
Keep reading, and we’ll explore various options on how to approach this.

Styrene joints
To use styrene for joints, you will need to purchase small styrene rods from your local hobby store. Styrene comes in white plastic, and rods of every size are available. Choose a size that is as close to the neck post of the head you are adding the styrene to . There should be a tiny circle leftoever on the undersize of the head once you slice off the neck post that you can use as a source of comparison.
Wire Neck Joints
For a wire neck post, all you need is a wire coat hanger. Using wire cutters, trim off a 6 inch section of wire. You will install the head onto one end of the wire, and then trim down the excess as necessary.
The benefit of a styrene joint is that is allows a more firm joint. Unless the styrene post is perfectly aligned, though, you run the risk of the styrene neck post causing the head to go into the body at a slight angle.
The wire joint allows you to manipulate the head better as far as angle and positioning go, but it doesn’t grip the torso as well.
Installation
Regardless of whether you are using a styrene neck joint of a metal wire, the installation method is the same. Begin by taking the smallest drill bit you have available and drill a starter hole in the center of the new head, making sure to drill only about halfway into the head. Once you have the starter whole complete, measure the width of the styrene or metal road and select a drill bit of the same thickness. Using this, drill into the head again to expand the starter hole.

Test the hole to make sure the styrene / wire neck post has a proper fit. Remove the neck post and add a drop of Super Glue to the hole. Place the neck post back into the hole and allow the glue to dry.
In the meantime, check to see the width of the hole left in the torso of the figure. If the neck post fits perfectly, then you are almost done. If not, then either widen the hole using the drill bit, or simply add a few layers of Scotch tape to the neck post to gradually extend the width. Test fit the head, now glued to the neck post, into the hole. Trim the neck post as necessary.
Note: Either of these previous techniques can be applied to arm joints as well!Also great for giving a figure interchangeable heads!

Boil and Pop Method
If you want to try and preserve the neck post on the head of your figure, you might want to consider giving the Boil and Pop method a try. Simply pour near-boiling water into a small coffee cup and place the figure upside down into the water. Let it sit there for a minute or so, until the plastic is softened. Remove the figure, careful of the hot water that will pour out.
Maintain a firm grip on the head of the figure and give it a good yank. If all goes well, the head will pop out with the neck intact. There’s a good chance that the neck post will simply distort, so you might end up having to slice it off regardless. However, if you do manage to get the head off intact, then force it into the body of the new figure while it is still warm. Use a flathead screwdriver to help you guide it into place.
While there’s no guarantee you will have a perfectly snug fit, the Boil and Pop method is still a useful approach at times. And, if all else fails, you can always slice off the stretched neck post and insert a rod as shown above.
Hope this helps!
