Originally printed in ToyFare Magazine #119
CUSTOMIZING 101: THE AMAZING SCREW-ON HEAD:Create an Artist-Specific custom with help from Matt ‘Iron-Cow’ Cauley of Iron-Cow Productions– Words, photos, and custom figure by Matt ‘Iron-Cow’ Cauley
You’ve been experimenting with customs for awhile now and you’re ready to move on to something a bit more challenging? You want not only an action figure of a particular character, but one that matches the style of the artist who made him famous?
Not only that, but the President himself has called you in as a matter of national security?
Grab your gear and follow along as ol’ Iron-Cow explains the whole step-by-step process. Can you do it? Yes, sir!

Tools You Will Need:
- Hobby knife, extra-sharp (bandages and gauze optional)
- Magic Sculpt sculpting compound
- Dremel with cutting blade and sanding attachments
- Power drill with various drillbits
- Metal wire coat hanger
- Wire cutters
- Super Glue
- Disposable latex gloves (found at any local drug store)
- Hobby brushes
- 1 thick rubber band (to form the basis for the neck)
- 1 plastic drywall anchor
- Spray primer
- Hobby paint – grab a handful of various pewter / silver metallic finishes
- Testors DullCote
- Protective eyewear / safety goggles
- Gasmask / Dust mask
![]()
Base Figures You Will Need:
- Marvel Legends First Appearance Iron Man
- Marvel Select Doctor Doom

Step 1: Gather Visual Reference
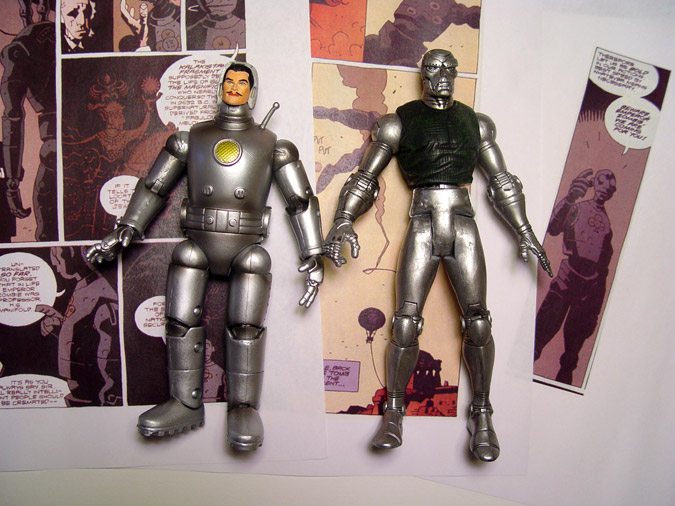
Since the Screw-On Head figure will be based directly on the artwork of Mike Mignola, you will want to print lots of visual reference to help you select your parts and give you guidance as you create your custom.
While the Iron Man torso is a great match, the overall figure is too squat and will need parts brought in from the Dr. Doom piece.

Step 2: Begin the Operation
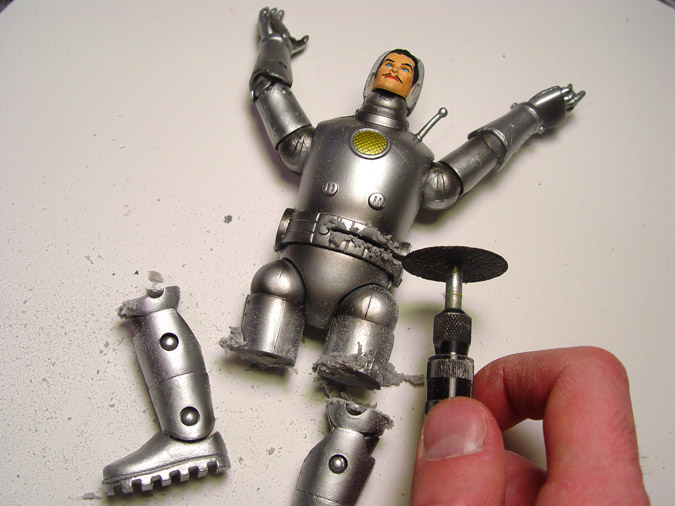
Using your Dremel, you will want to slice apart the two figures into sections.
Keep in mind it’s always better to not cut enough rather than cutting too much. Make sure to wear protective goggles while using any power tool, as the little bits of plastic will definitely come flying at you.

Step 3: Survey the Damage
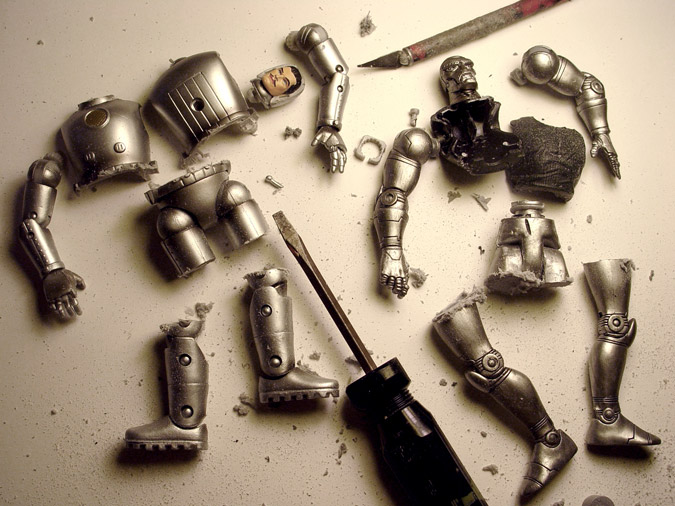
Behold the carnage!
Once you get some of the initial cuts started, you can use a screwdriver to help pop apart the torsos. This will help preserve the inner structure for when you start mixing and matching parts.

Step 4: Begin the Clean-Up
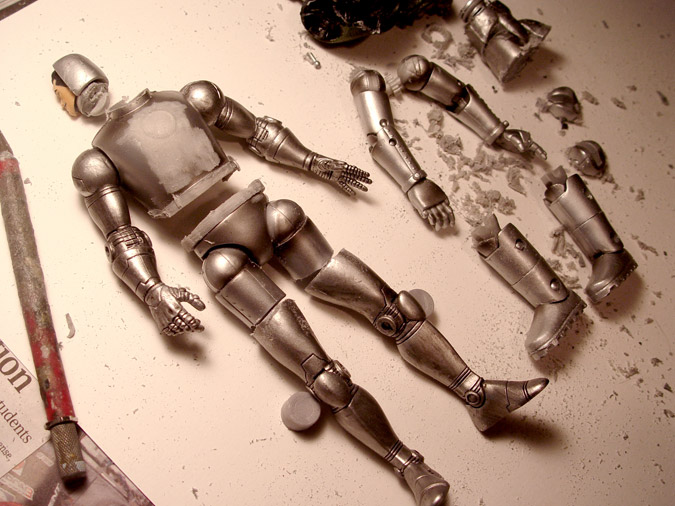
Once you are finished making all of your cuts cuts, lay out your parts to see how everything fits together, as well as how closely it matches the source art.
After reviewing my own progress, I felt the Dr. Doom forearms were too short and stubby to match Mignola’s artwork, so I added in the leftover forearms from the Iron Man to add length.
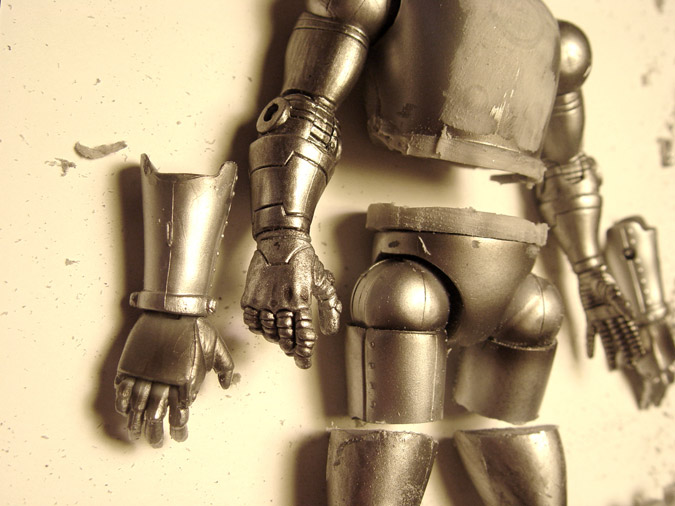

Step 5: Prep the Hands and Legs
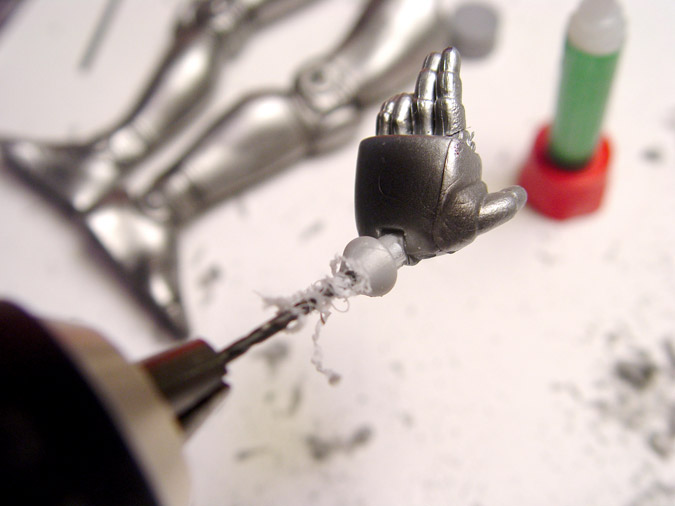
Using a power drill, carefully drill into each of the forearms, legs and hands.
You can then insert small pieces of a metal coat hanger into the holes to help add support for the next step.
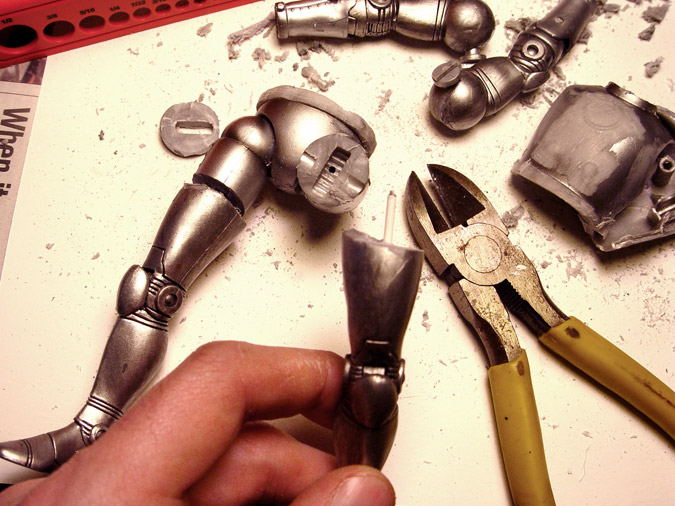

Step 6: Reattach the Limbs
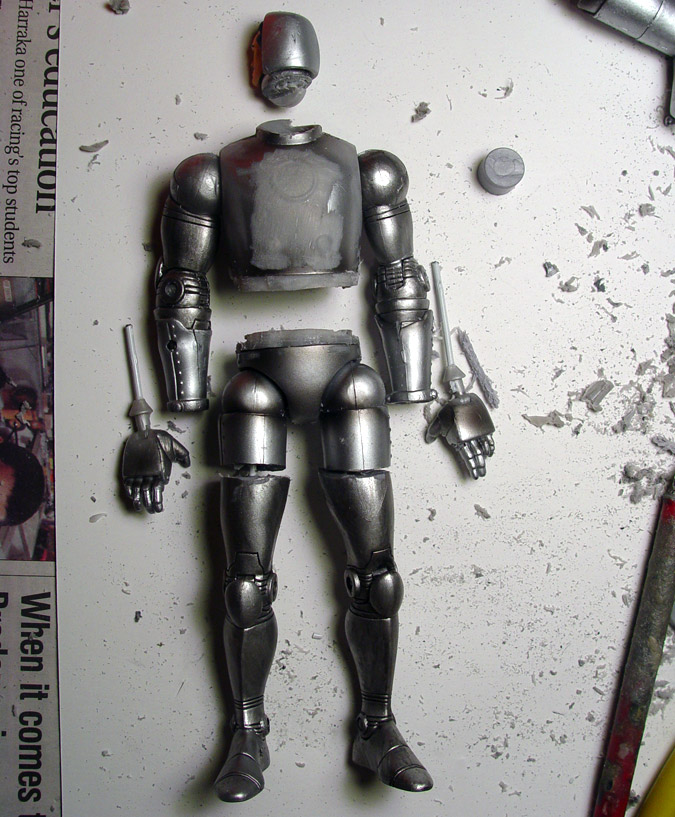
Glue the metal rods into the hands and lower legs, and then re-attach the limbs to the body. The gaps are intentional. This will allow you to adjust the limbs so the figure stands level.

Step 7: Fine-Tune the Sculpt
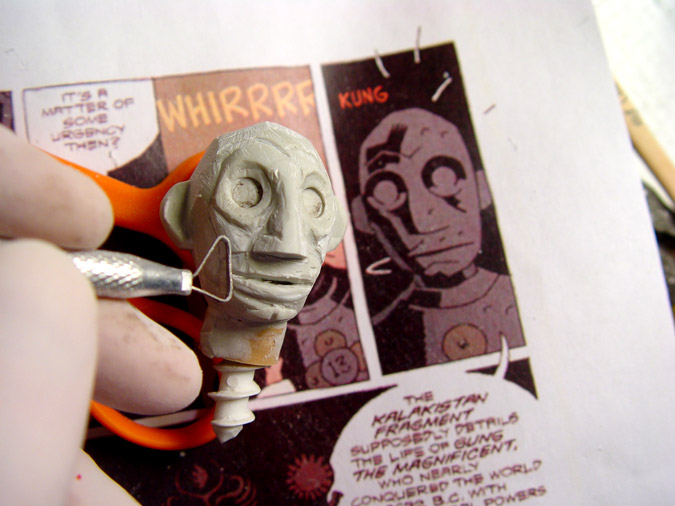
Wearing your disposable latex gloves, begin sculpting the details and filling in any gaps on the figure using Magic Sculpt. This is a two-part compound that air-cures and requires no baking. Use a little dab of water to help smooth the overall surface, and once the Magic Sculpt starts to set, go back in and carve out a handful of nicks and dents reminiscent of Mignola’s artwork.
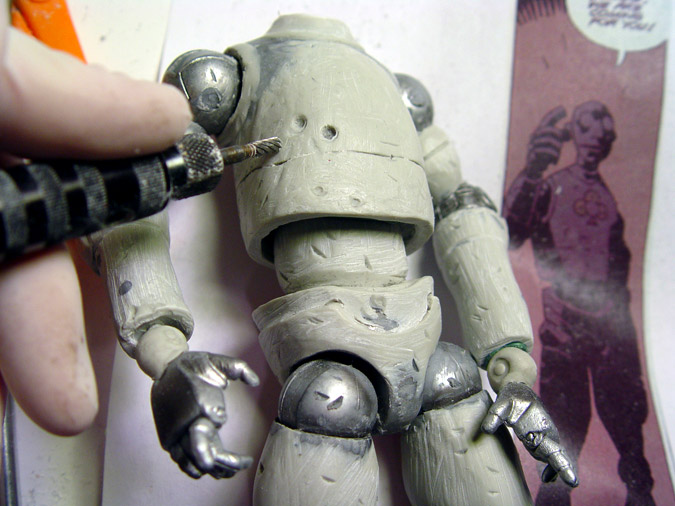
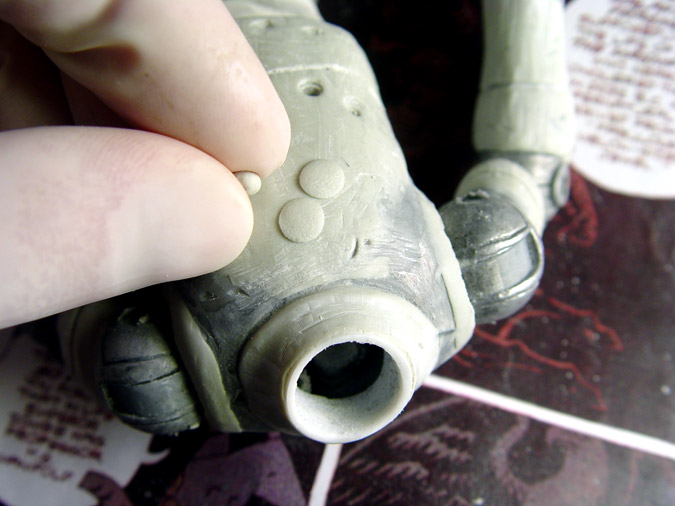

Step 8: Review Your Work so Far
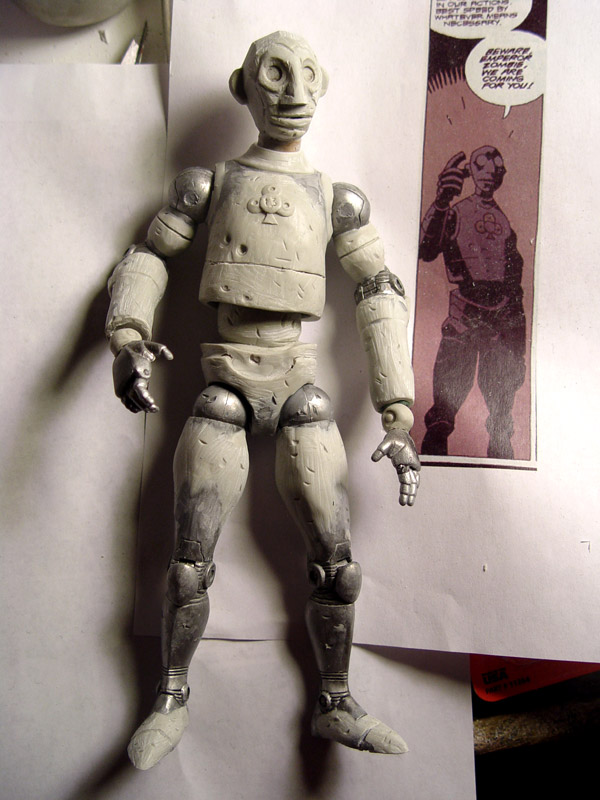
Allow the Magic Sculpt to fully cure, then compare your sculpt to the source material. You’ll want to pay special attention to the specific angles of Mignola’s artwork.
Use a fine grade sand-paper to help even out the areas between the original plastic and your added elements.

Step 9: Prime the Figure
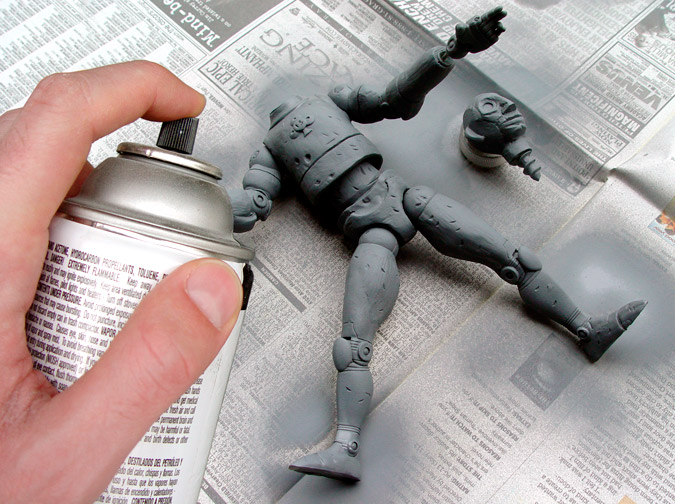
In a well-ventilated area, apply several light coats of spray primer. Allow each coat to dry before applying the next. One suggestion is to support the headsculpt on the cap of a water bottle. This will help prevent it from sticking to the newspaper.

Step 10: Drybrush to bring out details
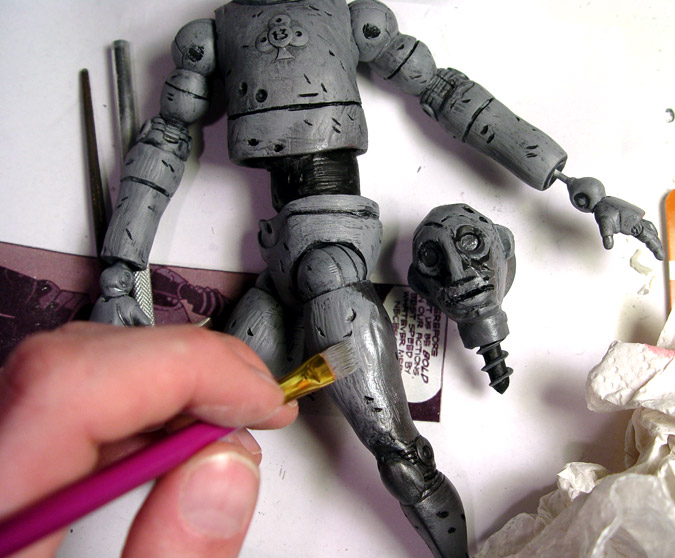
To help bring out the details of the figure, drybrush your various metallic paints over the surface of the figure. Use the darker metallics for any areas in shadow, while applying the lighter tones to the highlights.
Make sure to fill in all the dented areas with black to help them stand out.

Step 11: Marvel at the Finished Figure!
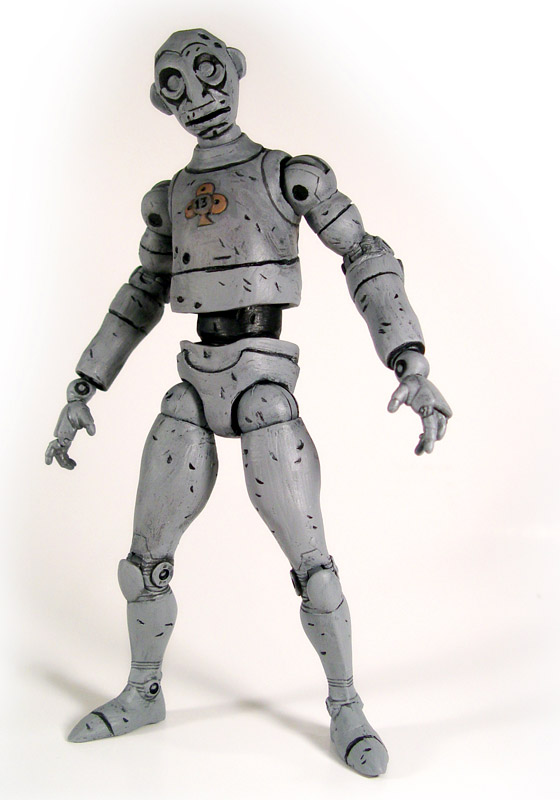
Finish by sealing the figure with several coats of Testors DullCote spray. This will even out all the lusters and give your custom that ‘manufactured’ appearance. With that, you’re done!
Another job well done, Screw-On Head!

To see the rest of Iron-Cow’s customs, including his previous work for ToyFare, head on over to www.ironcowprod.com.
