Originally printed in ToyFare Magazine #125
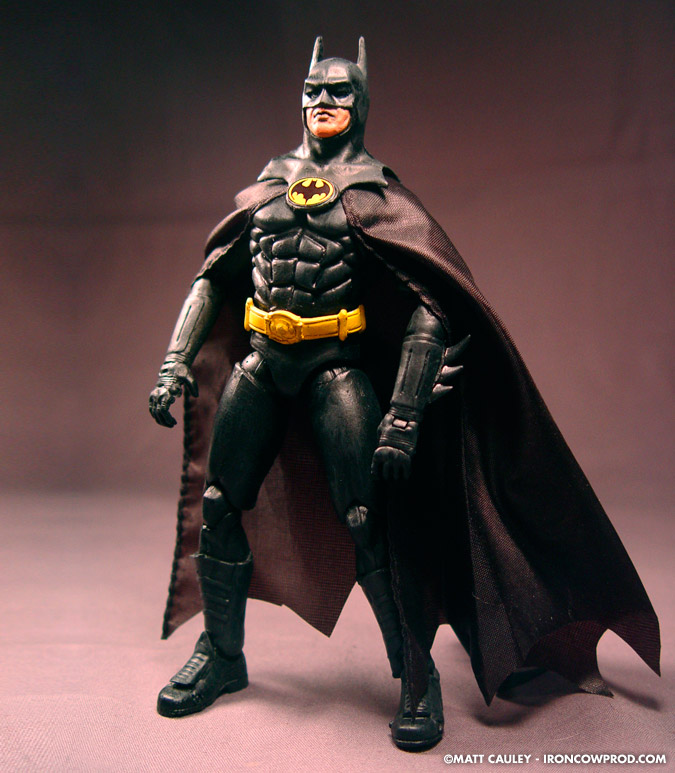
Experiment with molding and casting to get all the custom parts you need with help from Matt ‘Iron-Cow’ Cauley of Iron-Cow Productions – Words, photos, and custom figure by Matt ‘Iron-Cow’ Cauley

Wanting to make a 6″ scaled masterpiece, but the perfect parts are all way too big? In the olden days, you’d have to tough it out and make do with what was available to you. Now, through the magic of casting and shrinking, you can make your own parts in any scale you desire! Grab your gear and take good notes as ol’ Iron-Cow explains the process of scaling down parts for a 6″ scale custom. Make sure to spread out lots of newspaper… it’ll be messy!
- Oomoo 25 Liquid Rubber
- Smooth-Cast 320 Liquid Plastic by Smooth-On
- Spray Mold Release (Ease-Releaseâ„¢ 205 from Smooth-On)
- Hydrospan 400 (aka Hydroshrink)
- Kleen Klay (several boxes)
- Clear packing tape
- Several thick rubber bands
- A few sheets of Foam Core
- Pitcher full of ice water
- 90% rubbing alcohol (for clean up)
- Disposable latex gloves (found at any local drug store)
- Disposable wooden stirrers
- Various disposable mixing bowels w/ spouts, plastic cups… all sizes!
- Flexible disposable cake spatulas
- Hobby knife, extra-sharp (bandages and gauze optional)
- Magic Sculpt sculpting compound and fine-grade sandpaper
- Dremel with cutting blade and sanding attachments
- Super Glue
- Hobby brushes
- Spray primer
- Small sculpting tools
- Hobby paint
- Testors DullCote
- Protective eyewear/safety goggles
- Gas mask/Dust mask
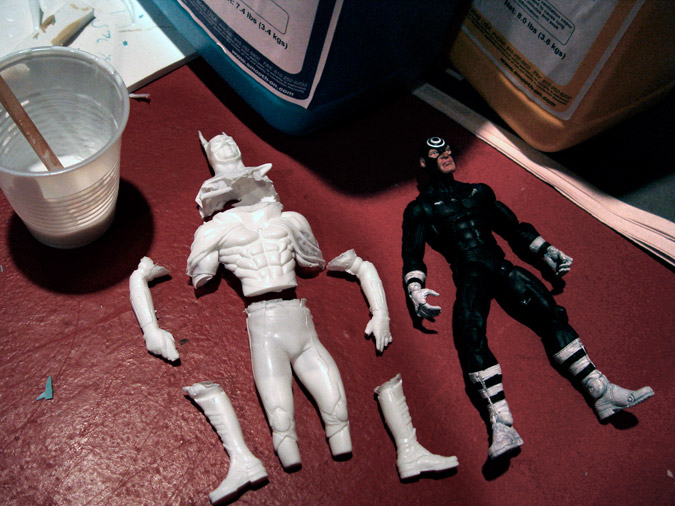
- Batman vinyl kit (or any 12″-scaled toy you want to rework)
- 1 super-poseable figure (we’ll be using a Marvel Legends Bullseye)


Using foam core, create a box deep enough that will it house the part you want to mold. Submerge the piece into the Kleen Klay, making sure that there are no gaps along any of the edges that the silicone might seep into. Push several dents into the Kleen Klay. These will serve as registration marks for the mold. Build up extra Kleen Klay along the base to serve as a pour spout. Finally, coat the entire surface with mold release, including the walls of the foam core.

Mix equal parts Oomoo 25 and then pour into the mold box, making sure the mixture covers at least 3/4″ above the highest point on the part you’re molding. Although the rubber cures in 75 minutes, I let it sit for at a couple of hours before I proceed to the next step.

Slice away the seams of the mold box and remove most of the Kleen Klay, leaving only a pour spout. Use Rubbing Alcohol to clean up any residue. Retape the edges of the box and fill any seams along the edge with Kleen Klay. Spray with Mold Release, covering every surface thoroughly. This is absolutely the most important step, as you do not want the silicone bonding with itself! Repeat the molding procedure from step 2. Once this fully cures, you will have a 2-part mold at your service.

Spread out a LOT of newspapers, as this next step is very messy. Use several thick rubber bands and more foam core to re-enforce the 2-part mold. The Hydroshrink will have the consistancy of milk when poured, so seal all outside seams with Klean Klay to prevent leakage. Place the mold inside an oversized plastic box as a preventative measure.

Mix 4 parts ice water to 1 part Hydroshrink. Use the flexible spatulas and stir the mixture for a good 15 seconds. Pour this into the mold, gently tapping to remove any air bubbles. Time is of the essence, as the mixture will shift from ‘runny milk’ to ‘soggy glue’ in no time at all. Let this cure for at least 30 minutes before removing from the mold.

*CAREFULLY* remove the Hydroshrink cast from the mold. The casting will be extremely delicate, so place it in a low-moisture area where it won’t be disturbed for the next 2-3 weeks. Make multiple Hydroshrink casts, and see which is the best fit once they all scale down.

Once the casts are to the right size, spray with mold release and then re-mold. To save time, I glue the cast to the bottom of an oversized clear plastic cup and make a 1-part mold. Once cured, you can carefully slice the mold in half using a hobby knife and achieve a similar effect to a 2-part mold.

Spray the new mold with Mold Release and re-enforce. Mix equal parts Smooth-Cast 320 Liquid Plastic and pour only a little at first, gently squeezing the mold to force the plastic into all the trouble spots: noses, ears, etc. These are notorious for air bubbles, so make sure those areas get covered before filling up the rest of the mold.

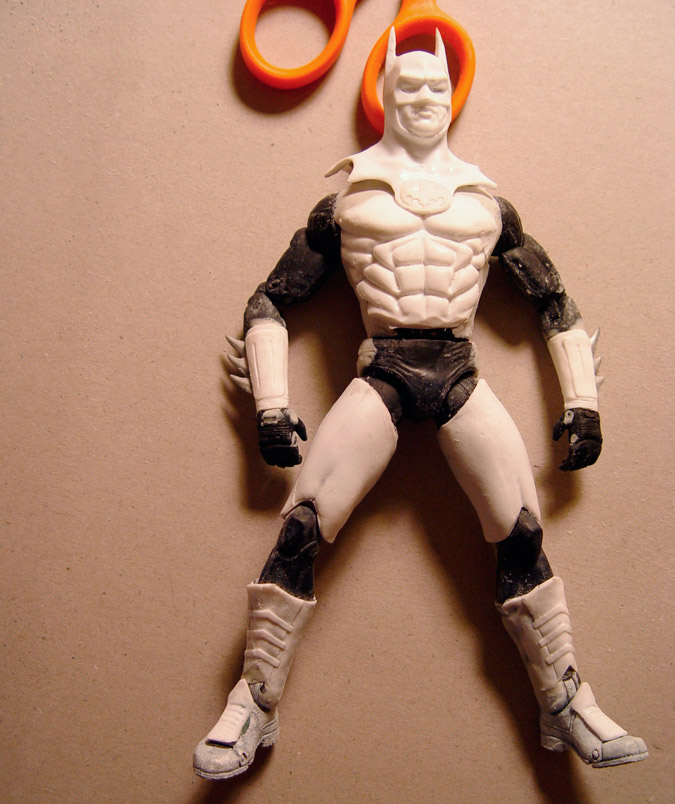
Remove the Liquid Plastic cast after 15 minutes. You can create a whole assortment of parts if you’re ambitious enough! Prime and paint as you would a regular custom. The Liquid Plastic cast is actually far more durable than your average toy, so you can drill it, sand it, prime it without any problems.

With a little patience, the sky is the limit as to how you can use Hydrospan to resize any parts you might need.

To see the rest of Iron-Cow’s customs, including his previous work for ToyFare, head on over to www.ironcowprod.com.